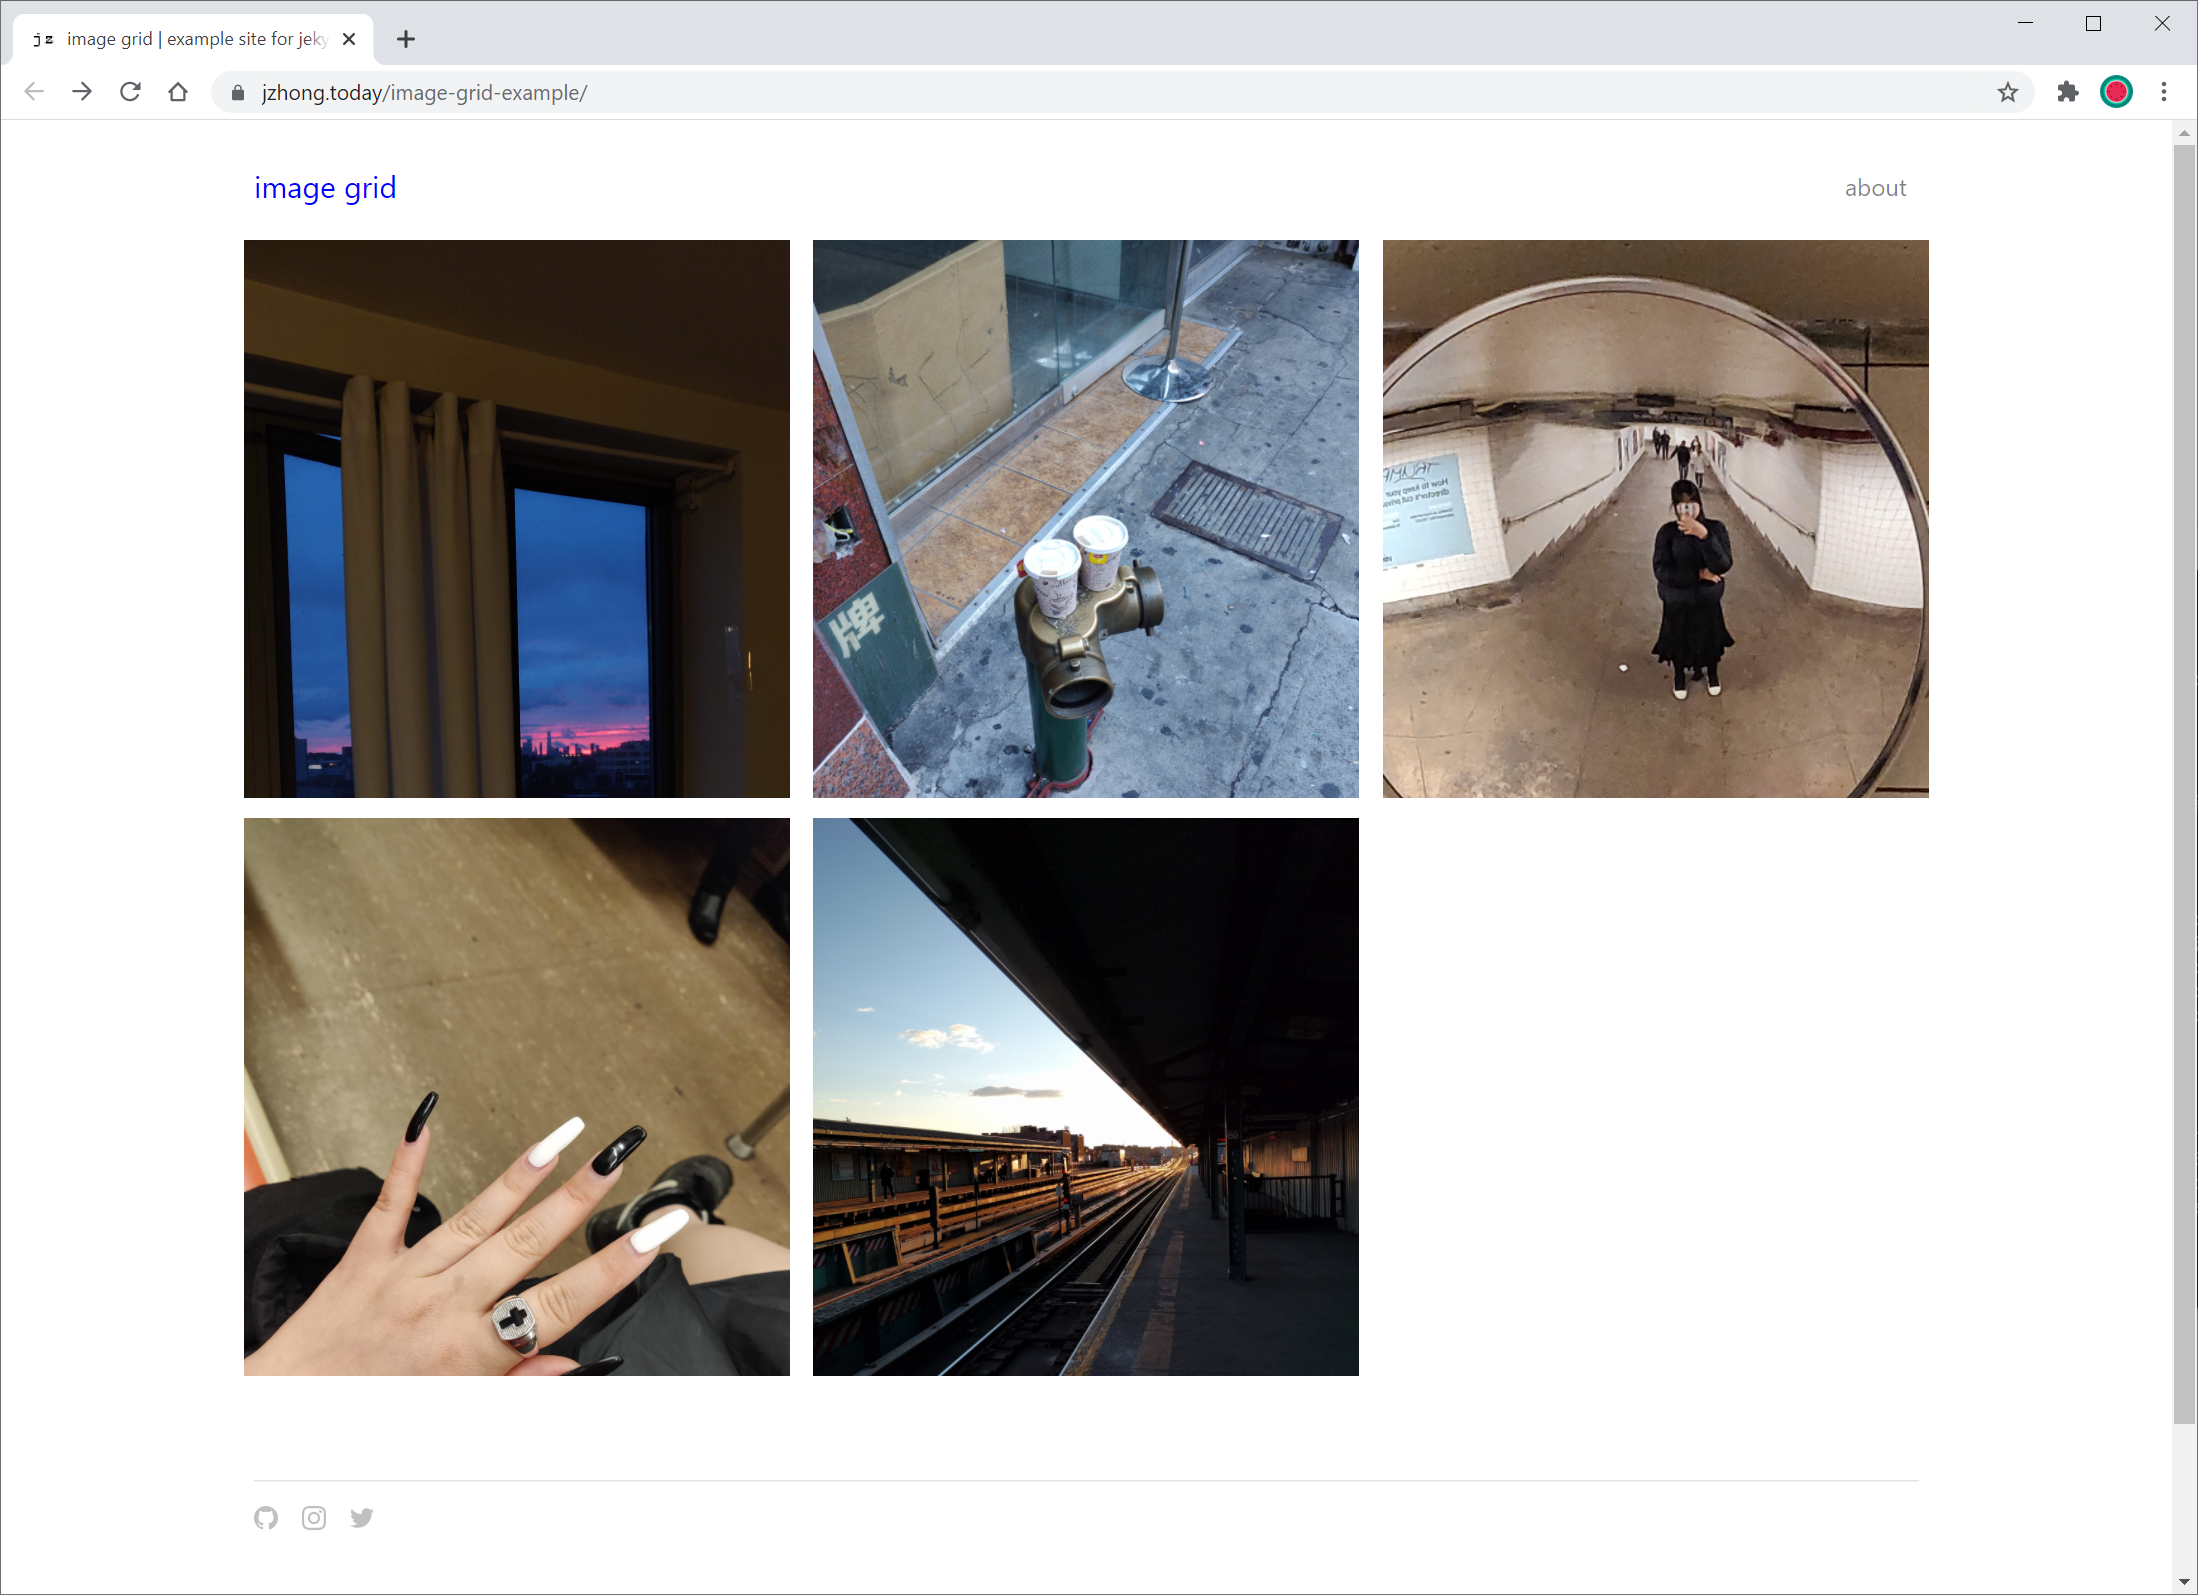
This is the third part of a multi-part series on creating your own static website for complete beginners. It will focus on using Jekyll with Github Pages and customizing Jekyll themes. Part one covered why we are coding our own website. In part two, we covered using git to save our work and Github Pages to host a webpage. Now, we will take our static site to the next level, making it easy to upload new content and manage a large number of web pages. By the end of the tutorial, you will have a static site setup similar to this blog example or this image grid example. Again, everything used to complete this tutorial is free! All you need is a computer (Mac, Windows, or Linux) and an internet connection.
Why do we need to use Jekyll?
After following part two, you now know how to create a basic web page with HTML and CSS. That would be fine for a simple website with only a few pages. However, what if you wanted to create a website that hosts a lot of content and is updated frequently? For example, if you were to create a blog site similar to this one, how would you keep all of your pages organized and consistent over a period of several years? How would you make an edit to the layout of the site, such as adding a new link to the navigation bar, without manually editing every single HTML file? This is where Jekyll comes in. Jekyll is a static site generator. This means that it is software that takes folders of files that are formatted in specific ways and uses them to generate the HTML and CSS files that build up your website. Static site generators make it easy for you to start adding content to your site and keep it organized.
There are other static site generators. We are using Jekyll because it is compatible with Github Pages, the free hosting service we are using. Jekyll can also be run on other hosting services. You can also use Jekyll to build your site locally, and then host the generated website files on any hosting service. So, even though we are using these specific software and platforms, you and your content are not locked to them forever.
Another reason to use Jekyll is the amount of community made themes available for use with it. If you are not interested in learning the details of web development technology or customizing your website, you can easily install a theme with Jekyll and just start posting content. If you are interested in customizing your website, it is easy to work off of pre-made themes and get them to exactly what you want. For example, this site was built off of mint theme by aidewoode. You can see how different this site looks now compared to the theme it was built off of.
Finally, I wanted to include Jekyll in this tutorial series because I created an image grid theme that can be used with it. Part one of this tutorial series covered reasons to learn web development; many of those reasons were inspired by my experience posting on instagram for several years. To address the specific needs of our online community, this theme was made to make it easy for instagram users to display their existing image-based content on their own self-made website. A customized version of this theme was also used in Virtualgoodsdealer’s “Deleted in 2020” web exhibit. So if you are interested in displaying your work in a similar way, keep reading!
Project Structure
So far, we have covered in part two:
- bash
- git
- Github and Github Pages
This part will cover Jekyll sites at three different levels of customization. The later sections are optional depending on the degree that you want to customize your website and your comfort level with programming. The end goal of this tutorial is to set up a static site that you can use. So feel free to stop at the end of any of the below sections if you are happy with your site’s functionality and design.
- Jekyll and Github Pages - a basic Jekyll site hosted on Github Pages
- Github Pages Jekyll Remote Themes - installing a theme onto your site
- Customizing Jekyll Themes - customizing your site’s theme
Installing Ruby and Jekyll
In order to install and run Jekyll, we have to install ruby. Ruby is a programming language that Jekyll is built with. Before we install ruby, we are going to install RVM. RVM or Ruby Version Manager allows you to easily install and manage different ruby environments on your system. Like part two, the installation instructions differ if you are using a Mac or a Linux subsystem with Windows 10. So, skip to the section for the operating system you are using.
MacOS: Installing RVM
First, open your terminal window. See part two if you need a refresher.
Check if you have GCC installed. GCC is needed by RVM to compile the ruby versions.
gcc --version
You should see an output that says ‘gcc’ and a version number if it is already installed. If it is not installed, you will be prompted to install it bundled with Apple’s Command Line Tools for Xcode. You can also install Apple’s Command Line Tools for Xcode through their developer website.
After installation, restart your terminal by quiting it and relaunching it. Run gcc --version again to verify that it has been installed.
Now, run the following command to install RVM.
curl -L https://get.rvm.io | bash -s stable
After installation, restart your terminal and run rvm --version to verify that it has been installed. You should see an output that says “rvm” and some version numbers. We can now move on to installing ruby.
Source: “Installing Ruby and Rails on Mac OSX” by The Pragmatic Studio
Windows: Installing RVM
First, open your Ubuntu terminal window. See part two if you need a refresher.
Run the following commands to install RVM.
sudo apt-get install software-properties-common
sudo apt-add-repository -y ppa:rael-gc/rvm
sudo apt-get update
sudo apt-get install rvm
Add your Ubuntu user to RVM with the following command where “yourusername” is replaced with your Ubuntu username.
sudo usermod -a -G rvm yourusername
After installation, restart your terminal by quiting it and relaunching it. Run rvm --version to verify that it has been installed. You should see an output that says “rvm” and some version numbers. We can now move on to installing ruby.
Source: RVM package for Ubuntu
Installing ruby
Install ruby with RVM.
rvm install 2.7.2
This is installing version 2.7.2 of ruby. You can read more about the different versions of ruby available on the ruby website.
After installation, restart your terminal again. You want to tell rvm to use the version you just installed and not the default one that comes with your operating system.
rvm --default use 2.7.2
Make sure that you are using the correct version of ruby by running ruby -v. You should see an output of “ruby 2.7.2p137”.
Installing Bundler and Jekyll
Jekyll is built with ruby. When you create your site with Jekyll, in order to generate the website files, Jekyll will use a lot of libraries of ruby code. In order for your Jekyll site to run properly, you need to have access to all the libraries of code that were used to create it. Bundler is a software that will organize and install all of those libraries so you always have the correct dependencies installed. In ruby, libraries of code are called gems, so we will be using that terminology from now on.
Let’s install Bundler and Jekyll.
gem install bundler jekyll
Setting up a new Jekyll site with Github Pages
Navigate to a folder that you would like to save your site in. In the previous part, we created the folder and git repo “yourgithubusername.github.io” for a Github Pages site (where “yourgithubusername” is your Github username). However, now that we are creating a site with Jekyll, we need to start over from scratch. You need to either delete the existing local folder and Github repo or rename them both to something else. If you decide to save your previous files and rename the repo on Github.com, you will need to update the url of the remote repo in your local repo if you still want to push files from it.
Then, run the following command but replace “yourgithubusername” with your github username.
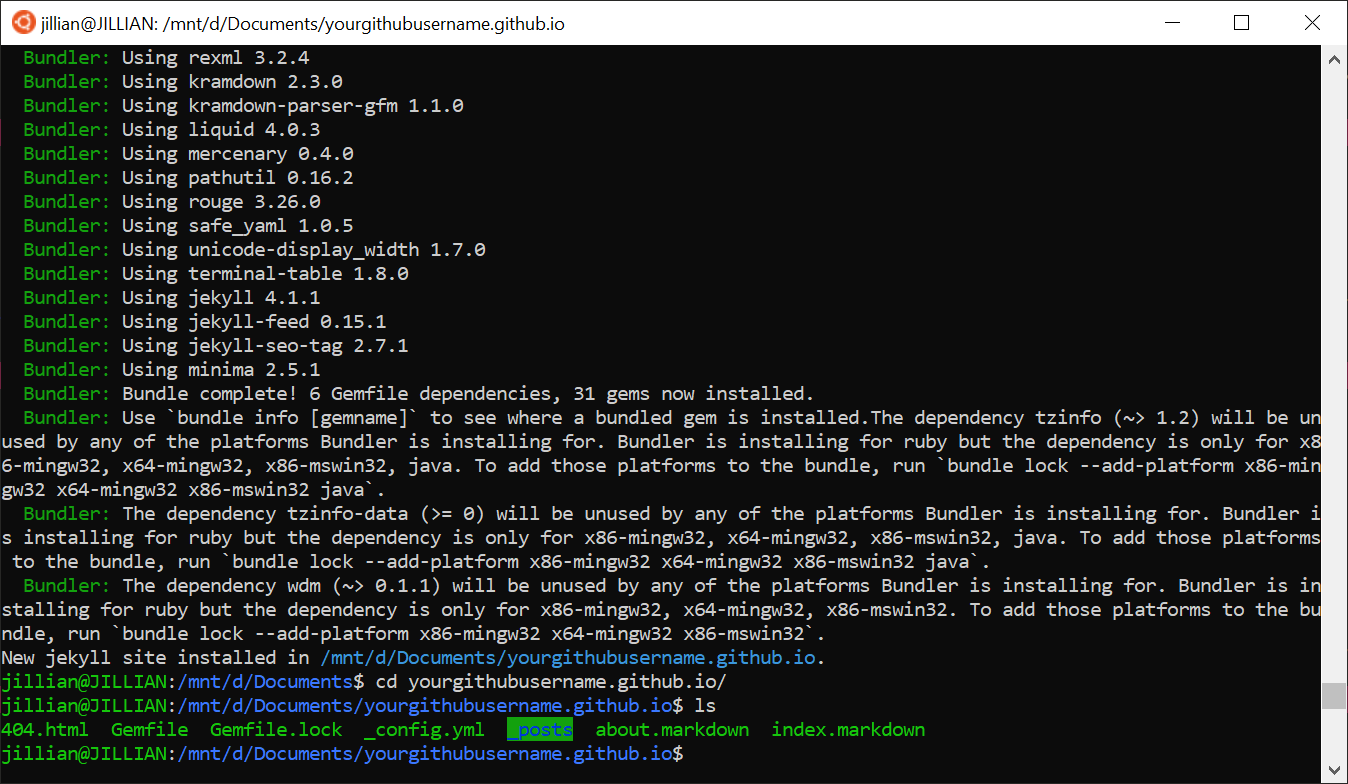
jekyll new yourgithubusername.github.io
This will create a new basic Jekyll site in the folder “yourgithubusername.github.io”.
Running the Jekyll site locally
Navigate inside of the new folder with cd yourgithubusername.github.io. You should now see a bunch of files that make up your new Jekyll site.
To test your site locally, run the following command in the root of your Jekyll site (directly inside the folder “yourgithubusername.github.io”).
bundle exec jekyll serve
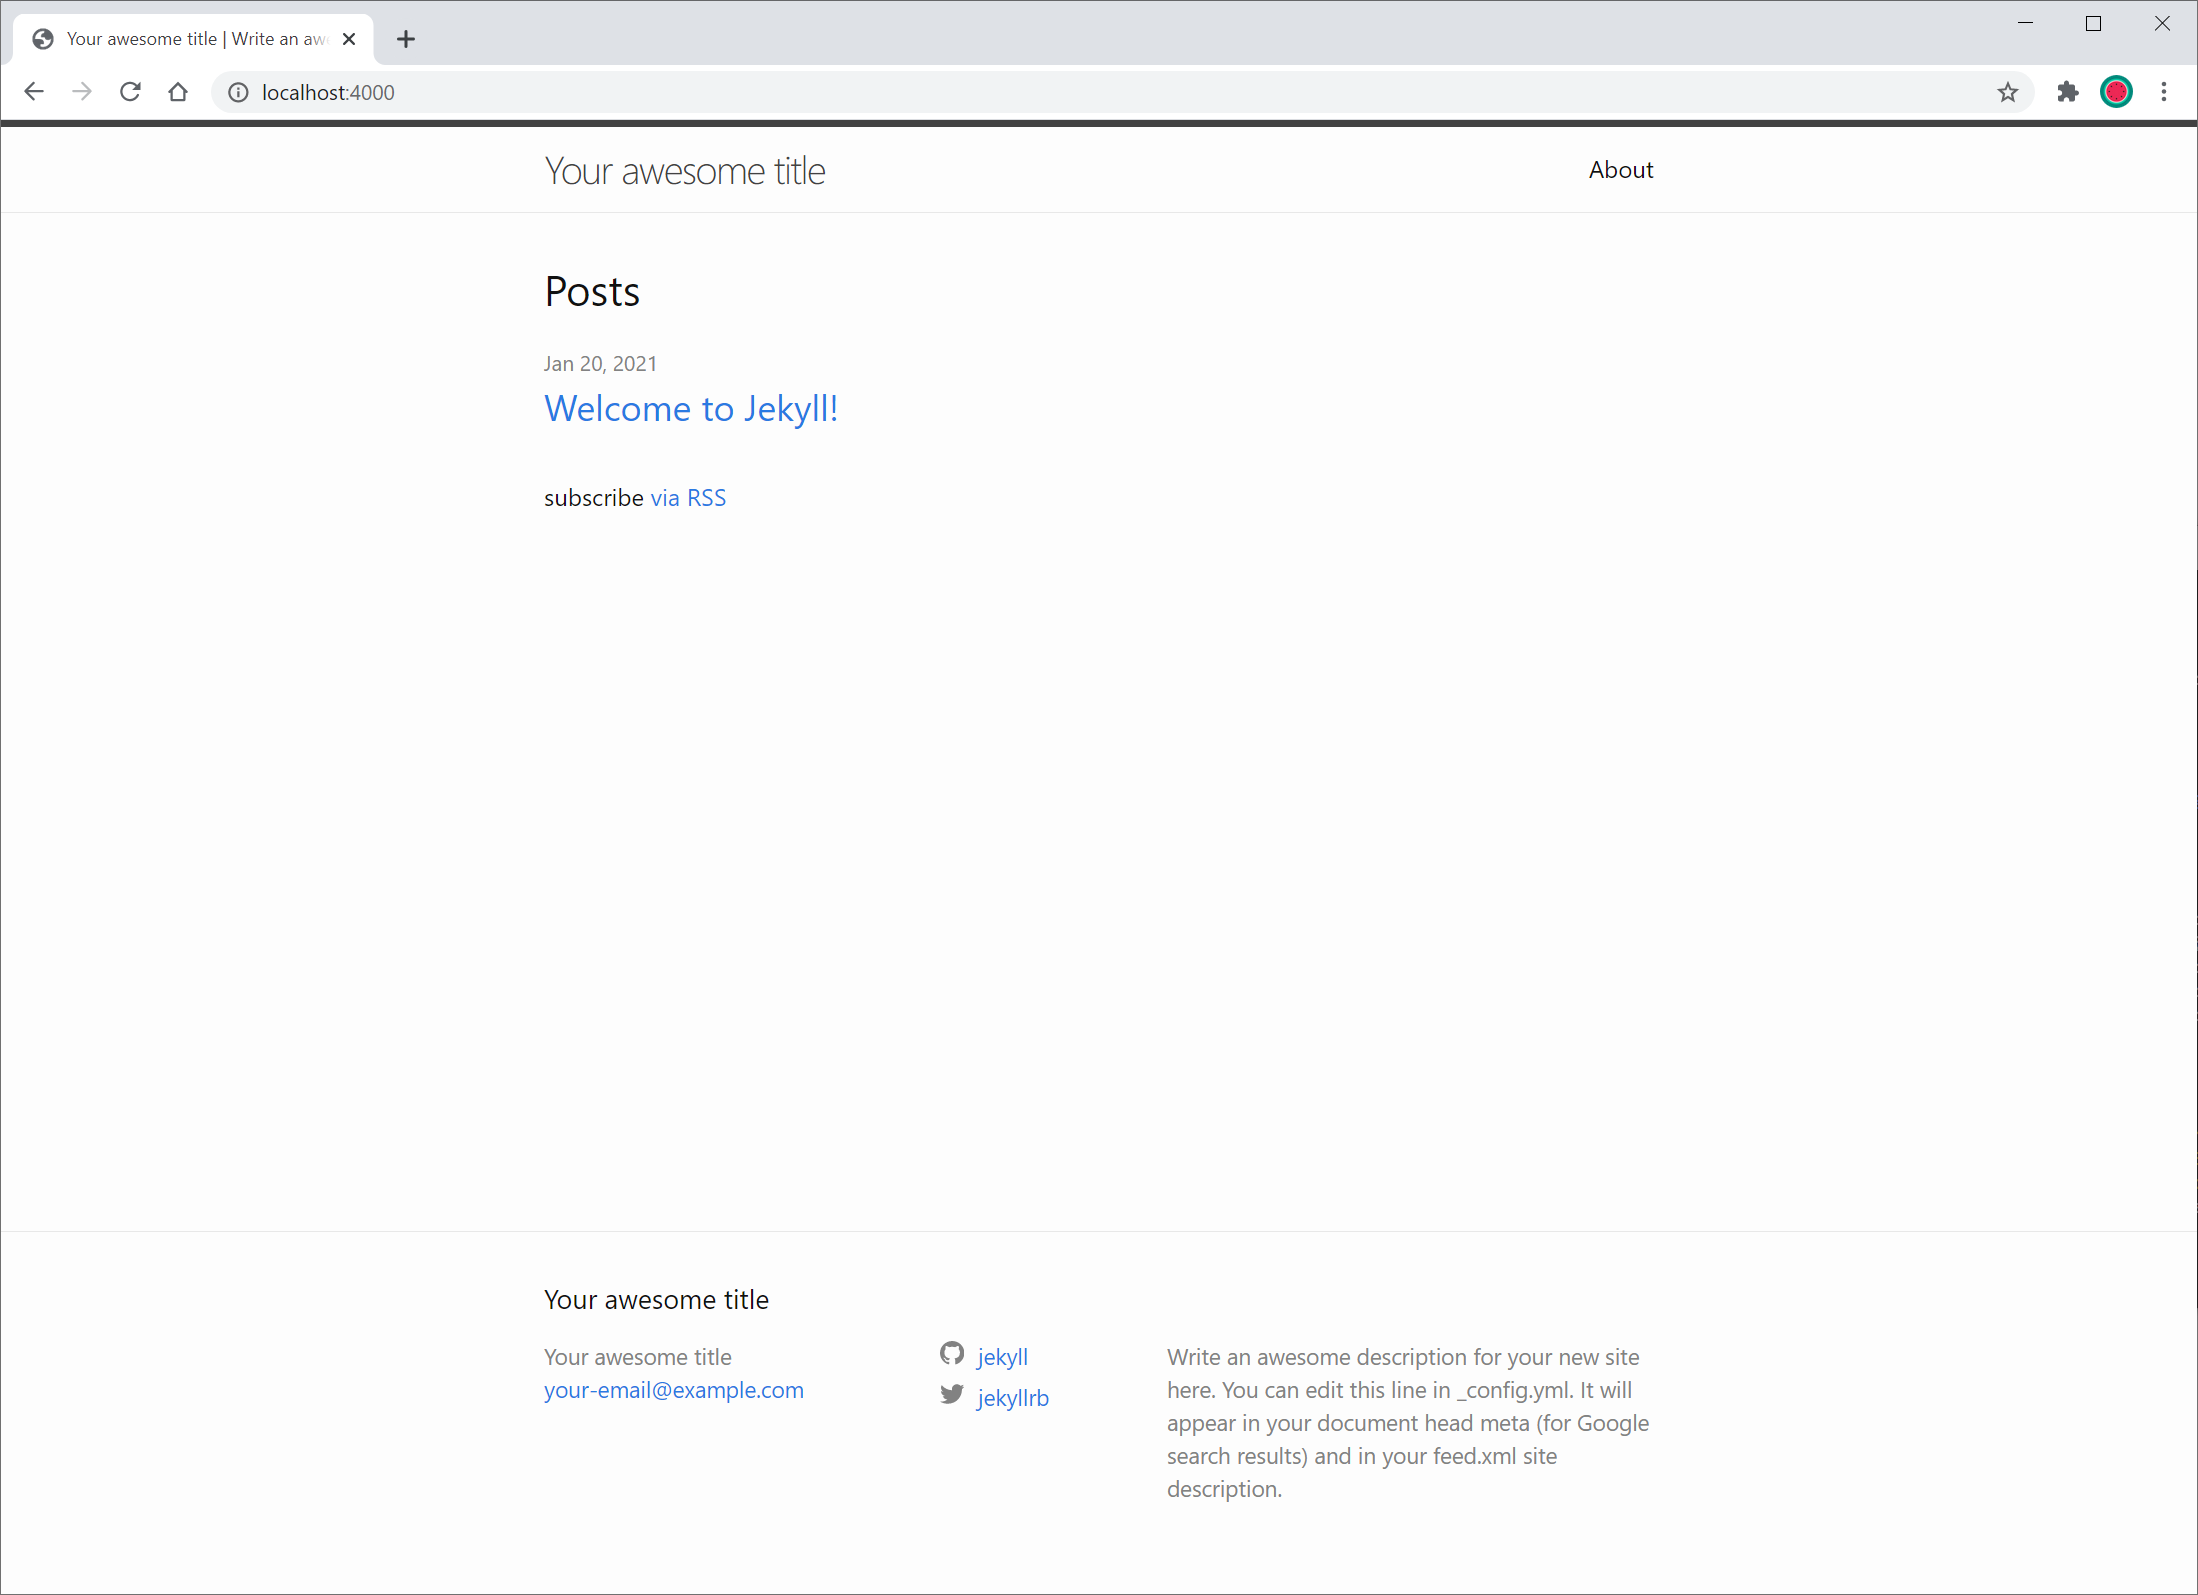
After you see the text “Server running…”, open your web browser and type localhost:4000 in the address bar. After pressing enter, you should now see your new basic Jekyll site running locally.
From now on, use bundle exec jekyll serve to generate your website from your local files and view it in your browser. You should do this anytime you make changes to your files to make sure everything is working correctly.
Stop the server by typing Ctrl-C while in the terminal and start it again with bundle exec jekyll serve.
Hosting your site on Github Pages
Now we have to connect our new site to Github and host it on Github Pages. A lot of this process is going to be the same as what we covered in part two. In this part, I will go through the necessary steps quickly, but you can view the links below to specific sections of part two or the quick git command reference for more details. First we need to create a new git repo and make our first commit.
Create a git repo in your new Jekyll site folder.
git init
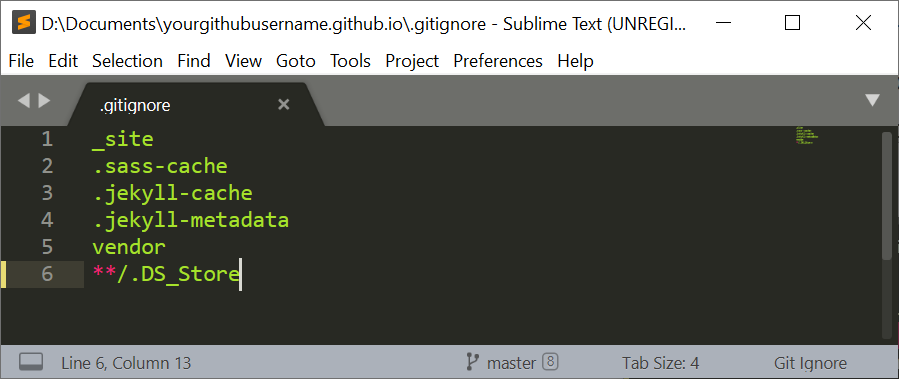
If you are using MacOS, open the .gitignore file in your code editor and add **/.DS_Store after all the text in the file. Then save and close the file.
Stage all of the changes to files in this folder.
git add .
Check to see if the correct files are staged to be committed.
git status
Commit all of the new files.
git commit -m 'initial commit'
Now we are going to create a remote repo on github.com and push our new commit to it.
In a web browser, go to github.com/new to create a new github repository named “yourgithubusername.github.io” where “yourgithubusername” is replaced with your github username.
On the web page for your new repository, follow the instructions under “…or push an existing repository from the command line” and run the following commands.
git remote add origin https://github.com/yourgithubusername/yourgithubusername.github.io.git (replace yourgithubusername with your github username)
git branch -M main
git push -u origin main
Enter your Github login information when prompted. The web page for your repository should now be updated with the new files.
Finally, we have to serve our new site on Github Pages. In a web browser, go to the settings page for your new github repo (github.com/yourgithubusername/yourgithubusername.github.io/settings).
Scroll down to the “Github Pages” section.
Under “Source”, click on the drop down that currently says “None” and change it to “main”.
Now, refresh the page and scroll back down to the “Github Pages” section. It should now say that your site is published. You can check the box next to “Enforce HTTPS”.
Your new Jekyll site is now live at yourgithubusername.github.io and can be visited by anyone at that address! Github Pages is using the files in your remote repo to generate this site. From now on, everytime you push changes to Github, they will automatically be reflected on your live site. That’s why it is important to test your site locally with bundle exec jekyll serve and going to localhost:4000 on your web browser before pushing changes to Github.
Using a basic Jekyll site
Understanding the site directory structure
Now, let’s take a closer look at some of the files that Jekyll uses to generate your website. You should see all of these files inside your project folder “yourgithubusername.github.io”.
Gemfile- file that Bundler uses to install the necessary gems for your site_config.yml- file that contains configuration settings for your Jekyll siteindex.markdown- file that is used to generate index.html (the default home page of your website)._posts- folder that all your files that represent posts will go inside
Check out the Jekyll documentation for more information on the structure of the Jekyll site directory.
For an example of a Jekyll site project folder, check out the github repo for this site. Note that we have more folders and files than your current basic Jekyll site.
Take a look at the _site folder. Jekyll takes in your configurations, markdown files, and theme HTML/CSS files, generates all the files for a website, and places it there. The files in the folder should be similar to the HTML and CSS files we created in part two. So if you aren’t planning on customizing your site’s theme, you don’t actually need to know HTML and CSS to use your Jekyll site (I still decided to cover it in part two so you can understand what Jekyll does). You will only be working with markdown files.
Editing the config file
First, let’s add settings to our site in _config.yml. Some settings in this file are specific to Jekyll and some are specific to the theme that is in use. You can also declare your own setting values and integrate them throughout the site.
The required settings for Jekyll should already be in the _config.yml file. Just replace the sample text with your information.
For more Jekyll settings you can set in the _config.yml file, such as permalink styles and including more folders, reference this guide, “Jekyll Configuration Options” from Simple Primate.
Note that if you make changes to _config.yml, the local server must be restarted for the changes to be reflected in the browser. Stop the server with Ctrl-C in the terminmal and start it again with bundle exec jekyll serve.
Using front matter
Jekyll uses markdown files saved in specific folders to generate web pages. In order for a markdown file (files with .md or .markdown extentions) to be used by Jekyll, it must have a front matter. Open the index.markdown file in your code editor. The frontmatter is the two lines of dash characters and anything inside of them. More on front matter in the Jekyll docs..
---
layout: home
---
Markdown files in the root of your website directory, such as index.markdown and about.markdown, will be generated at yourgithubusername.github.io/index.html or yourgithubusername.github.io/about.html. The only value inside the frontmatter that is necessary for these files is “layout”. That value corresponds to a layout HTML file in the theme files (more on this later).
Adding a new page
If you run your site locally and go to localhost:4000/about, you will see the content inside about.markdown. Notice that the “layout” value in about.markdown is “page”. This means that the about page is being generated with a layout called “page”. If you want to add another page to your site (such as a contact page), copy the setup and frontmatter values of about.markdown.
For example, you could create a file contact.md and save it in the root of your website folder with the following content.
---
layout: page
title: Contact
permalink: /contact/
---

Contact me at myemail@example.com
This new page would then be linked in the navigation bar at the top of the site and accessible at localhost:4000/contact or yourgithubusername.github.io/contact (this may vary depending on your theme and configuration settings). More on pages here.
Adding a new post
Organizing and displaying text-based content is built into Jekyll sites with posts. Use posts to organize content that is dated (has a date attached to it). The intended usage for posts is blogging.
All posts must be saved in the _posts folder. Go inside that folder and you should see a markdown file for an example post. When adding a new post, you can copy the front matter in this example post.
Post filenames must follow the specific format yyyy-mm-dd-name-of-post.md, where “yyyy-mm-dd” is replaced with the date of the post and the name of the post is seperated by dash characters.
For example, you could create your first post by creating a file named 2020-1-21-first-blog-post.md and saving it inside the _posts folder with the following content inside the file.
---
layout: post
title:  "My First Blog Post"
---

This is my first blog post!
Now, your post will be included in the home page’s list of posts (this may vary depending on the theme) and also have it’s own individual webpage.
Adding content with markdown
You might have already noticed that any text after the front matter section becomes the content of your pages or posts. Markdown supports a large amount of formatting features such as bullet points, links, images, and headings. Check out the Markdown Guide for the syntax needed to format the content of your pages and posts.
Installing a Jekyll remote theme
By now, you should have everything you need to start adding content to your basic Jekyll site. The next section of the tutorial will focus on changing the design of the site to fit your needs and tastes. To do this, we will install a different Jekyll theme and customize it.
Picking a theme
The default theme that is installed on your Jekyll site is minima. It is a good theme to start with for blogging and writing. Some other themes ready-made for blogging or any text-based content are (ordered from least complex and more complex):
- no style, please!
- mint by aidewoode
- alembic by daviddarnes
- basically basic by mmistakes
- minimal mistakes by mmistakes
When choosing a theme, consider the features that you need and your comfort level with using it. If you are planning on customizing the theme for your own needs, it’s better to choose a simpler theme to work off.
When researching themes for this tutorial, I couldn’t find a lot of free themes for image heavy content. Since that is probably what our community needs the most, I decided to create my own Jekyll theme, image grid. This theme currently only supports posts of images. I am also planning on updating it with more features such as text post support and tags/categories.
Next we are going to cover installing a theme both locally and on Github Pages. This is so you can test your site locally and also have it work on Github Pages. I will be using my theme as an example for the next steps in this tutorial. However, you can apply the same steps to any of the themes I listed above.
There are a lot more themes available on Github that can be installed in the same way. Some themes don’t support this method of installation; make sure you check the read me section (at the bottom of the Github repo page) to see the installation instructions.
Installing a Jekyll theme
This section will cover one method to install a Jekyll theme. This method will have the theme working on Github Pages and locally. It’s simple while also making it easy to pull any updates to the theme or switch between themes in the future.
Github Pages supports any Jekyll theme that is hosted on Github; the theme’s Github repo just needs to be listed in the site’s configuration file to get it running on Github Pages. To test the site locally with the theme, the Github Pages gem needs to be installed. The Jekyll theme’s gem can also be installed, if it is available, to see all the theme files locally (this step is optional).
Navigate to your site folder “yourgithubusername.github.io”. Open the file called Gemfile in a code editor. In this file, list all of the gems that need to be installed to build the Jekyll site.
Add the Github Pages gem by doing the following.
Comment out the line that says gem "jekyll", "~> 4.1.1" by adding a # in front of it.
Uncomment the line that says gem "github-pages", group: :jekyll_plugins by removing the # in front of it.
Install the theme you are using locally by adding its ruby gem (this is optional).
Replace the line that says gem "minima", "~> 2.5" with the gem for the theme that you are using. You can usually find the name of the gem in the “Installation” section of your theme’s read me on Github.
For example, if you were using the image grid theme, it should say gem jekyll-theme-image-grid.
Your Gemfile should now look similar to this one. The image grid theme doesn’t use the jekyll-feed plugin so it is commented out. If the theme you are using uses that plugin, you can leave it there.
source "https://rubygems.org"
# Hello! This is where you manage which Jekyll version is used to run.
# When you want to use a different version, change it below, save the
# file and run `bundle install`. Run Jekyll with `bundle exec`, like so:
#
#     bundle exec jekyll serve
#
# This will help ensure the proper Jekyll version is running.
# Happy Jekylling!
#gem "jekyll", "~> 4.2.0"
# This is the default theme for new Jekyll sites. You may change this to anything you like.
gem "jekyll-theme-image-grid"
# If you want to use GitHub Pages, remove the "gem "jekyll"" above and
# uncomment the line below. To upgrade, run `bundle update github-pages`.
gem "github-pages", group: :jekyll_plugins
# If you have any plugins, put them here!
#group :jekyll_plugins do
#  gem "jekyll-feed", "~> 0.12"
#end

# Windows and JRuby does not include zoneinfo files, so bundle the tzinfo-data gem
# and associated library.
platforms :mingw, :x64_mingw, :mswin, :jruby do
  gem "tzinfo", "~> 1.2"
  gem "tzinfo-data"
end

# Performance-booster for watching directories on Windows
gem "wdm", "~> 0.1.1", :platforms => [:mingw, :x64_mingw, :mswin]
Save Gemfile and close it. Open your terminal and navigate to the root of your site folder.
Run the following command to use Bundler to install all the gems listed in Gemfile.
bundle install
From now on, if you make changes to the Gemfile, run bundle install to install all of gems needed by the project. If you need to update any gems that are already installed, run bundle update. More on Bundler commands here.. You can also refer to the quick Bundler and Jekyll command reference at the bottom of this page.
Next, let’s edit the site configuration file to work with our theme. Navigate to the root of your site folder and open the file _config.yml in a code editor. This file is where you set settings for your entire site.
Replace the line that says theme: minima with remote_theme: theme-author/jekyll-theme-name@branch where “theme-author” is the Github username of the author of the theme, “jekyll-theme-name” is the name of the theme, and “branch” is the name of the default branch of the theme on Github. You can find this information on your theme’s Github repo page.
If you are using the image grid theme, it should say remote_theme: jirrian/jekyll-theme-image-grid@main.
Note that if you don’t include the “@branch” at the end, Github Pages will default to looking for the theme on the “master” branch. However, as of October 2020, Github changed the default branch name for newly created repos to “main”. So depending on when the theme repo on Github was created, you may need to specify the name of the default branch. You can check if your theme’s repo’s default branch is called “master” or “main” by going to the theme’s Github repo web page and checking the drop-down box on the top left corner.
Source: “Testing your Github Pages site locally with Jekyll” from GitHub Docs
Source: Jekyll Remote Theme
Adding theme configurations
The theme should now work locally and on Github Pages. Test it locally by running bundle exec jekyll serve in your terminal and going to localhost:4000 in a web browser. You should see your Jekyll site with the new theme installed.
Note that if you make changes to _config.yml, the local server must be restarted for the changes to be reflected in the browser. Stop the server with Ctrl-C in the terminal and start it again with bundle exec jekyll serve.
Next, let’s add more settings that are specific to the theme you are using to _config.yml .
Read the “Usage” or “Configuration” section of your theme’s read me on Github or the config.yml file in your theme’s Github repo to see all the settings that are available.
Some plugins may be required by the theme. Make sure these are listed in the _config.yml file under plugins:.
If your theme provides a sample _config.yml file, it’s easiest to just copy the content into your _config.yml and edit the values from there.
If you are using image grid, here is a sample _config.yml file.
Finally, test your site locally again and make sure everything looks right. Keep in mind that depending on the theme that you are using, you may need to edit or add values to the front matter of pages and posts. Check the “Usage” or “Configuration” section of your theme’s read me on Github for details.
If you are using image grid, follow these specific instructions for front matter formatting and adding new image posts.
When you are ready, commit your changes and push them to Github.
git add .
git commit -m "your commit message here"
git push origin main
After a couple minutes, your site will be generated and served at “yourgithubusername.github.io”.
If you are happy with your theme and don’t need to customize it further, you are done! Continue to add new posts and pages to your site by creating markdown files, test your changes locally, commit your changes to git, and push your changes to Github.
Customizing a Jekyll theme
Jekyll themes can be further customized to your exact needs with some HTML, CSS, and Liquid. Themes are just HTML and CSS files in specific folders; Jekyll uses these files to generate the code for your website. To make edits to the theme, overwrite a theme file by creating a new file with the same name in the Jekyll site project folder. When generating the site, Jekyll will prioritize using the files in the site project folder rather than the ones in the theme gem or theme Github repo.
Editing layouts and styles
First, get a copy of your theme’s layout and stylesheet files downloaded onto your computer. If you chose to install your theme’s gem by adding it to Gemfile, you can open its installation folder.
Find the location the theme is saved in by running bundle info jekyll-theme-name where “jekyll-theme-name” is the name of the theme gem. There should be an output with a file path. Navigate to that folder (use the cd filepath command) and you should see all the theme files.
If you are using Windows Subsystem for Linux, I recommend to clone (download through git) the theme repo from Github outside of the Jekyll site project folder. This is because you cannot open the files saved in the Linux subsystem with Windows programs. You can also do this if you don’t want to install the theme’s gem.
git clone https://github.com/jirrian/jekyll-theme-image-grid.git where the url is for the theme you are using. More on cloning from Github with git here.
After you have a local download of the theme files, take a look at the folders listed below.
_layouts- folder with layout HTML files (these layouts’ filenames are referenced in page and post front matter)_includes- folder with HTML files that are referenced in other files (these are referenced with{% includes file-name %})_sass- folder with SCSS files that are used to generate CSS files used by the template
To customize a theme, copy the relevant file(s) from the theme folder to your site project folder while maintaining its directory structure. Then make the edits to that file and save.
For example, if I want to change the background color of the image grid theme, I would create a _sass folder in my site folder and copy paste the style.scss file into it. Then I would open the file in a code editor, change the background color value, and then save. While testing the site locally, I should see my changes to the theme.
Use the same method to make changes to any of the layout HTML files, includes HTML files, or scss files in your theme.
Resources for customization
I won’t go into the details of customizing Jekyll themes in this tutorial because it would basically be teaching all of frontend web development. If you are trying to figure out how to add a feature to your Jekyll site, I suggest first checking out the theme’s Github repo’s read me. There is also a large community of people using Jekyll online. You can probably find out how to implement many common features by searching for it on a search engine.
Two methods of organizing content in Jekyll sites that were not covered in this tutorial are collections and data files. I recommend reading about them if you want to add support for categories or make a portfolio site.
For the details on all Jekyll features, reference the Jekyll Docs. An important part of Jekyll sites is its support of Liquid. Liquid is a template language that is used to display a site’s content. The lines surrounded by curly braces in the layout HTML files are written in Liquid. For example, the language is used to display all the posts on the site’s home page. More on using Liquid with Jekyll here.
Jekyll plugins are a common way of adding more features to Jekyll sites. Currently, very few plugins are supported by Github Pages. However, it is still possible to include them in your Jekyll site by generating the site locally and then pushing to Github Pages. This tutorial by Nicu Surdu covers the process.
For more resources on learning basic web development, check out the resources section from part two.
Refer to the quick command reference below for Jekyll and Bundler commands we used in this tutorial.
Quick Bundler/Jekyll Command Reference
bundle exec jekyll serve - start generate Jekyll site and start local server viewable at localhost:4000 in a web browser. Type Ctrl-C inside the terminal window to stop the local server.
jekyll new foldername where “foldername” is the name of a folder - creates a new Jekyll site inside a folder
bundle install - installs all gems (and their dependencies) listed in Gemfile
bundle update gemname where gemname is the name of a ruby gem - updates specific gem
bundle info gemname where gemname is the name of a ruby gem - shows information about a specific gem
Now it’s up to you!
You should now be able to start customizing your Jekyll site for your needs!
This is the planned end for the simple website tutorial series. However, I’m considering writing a short tutorial on using a python script to migrate your instagram posts to an image grid themed Jekyll site.
Please use the form below to suggest other web development tutorial topics and feel free to reach out if you have any questions or suggestions on this tutorial! Also, if you are interested in writing a tech related tutorial for Virtualgoodsdealer Pages, let us know <3