TABLE OF CONTENTS
IN THIS TUTORIAL:
I will tell you about the different types of patterns I learned to make using GIMP, and show you step-by-step, how to make each design into your own creation. This is a complete beginner’s guide, as I, too, am a beginner. I hope this tutorial will help you become more familiar with GIMP’s interface and toolboxes. By the end, you should at least be able to create something similar to each of the following designs:
WHY GIMP?
I got by as a content creator making most of my content in my phone, using a combination of the following mobile photo editors:
- Phonto: for text editing
- PicsArt: for their stickers and filters, also for cropping/blending/enhancing images
- Background eraser: for its auto erase tool
- IbisPaint X: for brushes and other drawing tools
- Cut+Mix Studio: for layering/affining/face swapping
- Mirrorlab: for distorting, blurring, and generating patterns and gradients
- Powerpoint: cataloguing albums, batch saving, and text box tool
I still use, and highly recommend each of those apps, but as my audience and body of work grew, so did my interest in design, typography, collage, and optical art. I also began to think about developing an artist portfolio and business brand alongside my social media presence. In other words, I needed to build an online store and portfolio, and after some trial and error, I realized the free apps wouldn’t cut it. Here are a few reasons why:
- Resizing for prints: in order to get your designs printed, they need to be up to 4800px – none of the apps I mentioned can produce images over 2200px
- Color management: GIMP gives you more control over color profiles, and allows you to create monotone versions of your designs (as those are cheaper to print)
- optimizing photos for web: In order to start cataloguing my work, I needed a tool to edit, tag, and save my work, preferably in batches. I would come to discover, thanks to Forensic Files of all things, that The GIMP community created this free plug-in that helps you do just that.
Yes, I was introduced to GIMP in this highly questionable yet entertaining episode of Forensic Files where a well-meaning IT specialist with no forensic anthropology training was able to uncover the identity of a skeleton using GIMP. He simply took a photo of the skull, then superimposed, first his own face as a control, then various missing people’s faces until luckily the right one fit. What made me curious was that throughout the episode, he referred to GIMP as the “free photoshop.” At that time this is exactly what I was looking for.
Gnu Image Manipulation Program is an open-source photo editing software used by professional illustrators, designers, photographers, and scientists alike. This is due to GIMP’s sophisticated layering system which allows you to add/blend/transform/erase very specific components inside an image without compromising the surrounding areas or losing your earlier edits. This unlimited editing functionality, coupled with GIMP’s highly customizable library of tools, brushes, gradients, textures, and patterns is why GIMP is the best-known free alternative to Photoshop.
And thanks to GIMP’s community of contributors (as the source in “open source”) there are now over 100 GIMP-compatible plug-ins you can download for free. They, along with the software, are in constant maintenance and development, meaning any bugs are swiftly dealt with.
To conclude my why behind this tutorial: GIMP is a remarkable and magnificent tool that can outperform photoshop in many ways despite being 100% free, for anyone to own, forever.
GETTING STARTED
Installing GIMP
Download and install GIMP here
Installing Resynthesizer
Resynthesizer is a very useful plug-in that we will use for Method 2 in this tutorial. Download and install it here
Preparing Your Local Folder Tree:
In your local drive, create a “My GIMP” folder. Inside it, create the following folder tree:
- “My XCF Files”: this is where you’ll
Savemulti-layer projects if you want to be able to modify those layers at a later time.SaveorSave As:filename.xcf
- “My GIMP Exports”: this is where you can “Export” your creations. You can export a layer or a selection, or as by default, all the visible areas in your canvas as a single image.
- Note: in GIMP you may need to manually add the file extension. Use
Export As:filename.pngfor drawings, text, logos, icons, and images with transparent background.filename.jpegwhen it’s important to have a smaller file size/faster loading time.filename.gbrto make any image or selection into a brush.filename.patto make any image or selection into a tileable pattern.
- Inside “My GIMP Exports” create a folder named “My GIMP Patterns” - this is where you’ll export your .pat files temporarily before you can add them to GIMP’s built-in
patternsfolder.
- Note: in GIMP you may need to manually add the file extension. Use
Locating GIMP’s Built-in “Patterns” Folder
- Open GIMP
- Go to:
Edit – Preferences – Folders(+) to expand - select the
patternsfolder and copy its location from the address bar above. If there are 2 folders, select the one with “Roaming” in its address. Exit Preferences dialogue without saving. - Go to:
File – Open - Search. Paste the address in the search bar, select thepatternsfolder, then add it to GIMP’s shortcuts using the (+) at the bottom left of the Open dialogue. - While you’re still in the Open dialogue, navigate to your local “My GIMP” folder tree and add each of the folders you just created (especially “My GIMP Patterns”) to GIMP’s shortcuts.
- While GIMP’s built-in
patternsfolder is still in your clipboard, Open your local File Explorer and paste that location into the address bar. Select, then add the folder to your computer’s shortcuts/Quick Access Bar.
If you’re never going to work with GIMP again, this step might have been a waster of time. But if you do end up using GIMP, I just saved you many hours that I myself wasted rummaging through folders. Even if you don’t find this tutorial to be helpful, I hope that you’ll continue making, saving, and exporting things to fill these folders.
NAVIGATING GIMP
General Tips
clicking anywhere on the canvas/layer activates whatever tool is selected For example: if the text tool is selected, clicking on any preexisting text boxes enables you to edit the text. Clicking anywhere else on the canvas opens a new text box.
Until you are more familiar with GIMP’s interface, this is how you can find the various tools, windows, and settings you want to configure:
- Hover over the tools/sections one-by-one. The name and description of each should appear. or
- Go to:
Windows - Dockable Dialogues- Select the window you’re looking for - if it’s already docked and visible, it should flash in place. If not, a new dialogue should apprear.
To ungroup/show all the tools we will use in this tutorial
- Go to:
Edit - Preferences - Interface - Toolbox - Deselect the box that reads “Use Tool Groups”
If you want your icons to look like the ones below:
- Go to:
Edit - Preferences - Interface - Icon Theme - To switch to color mode: Pick the
Colortheme - To increase the size of the icons, select:
Custom Icon Sizethen drag to large. - click “OK”
More specifically, in this tutorial we will utilize the following tools, features, and dialogues/windows in GIMP
The Toolbox:
What happens when you click on your canvas is determined by what is selected inside the toolbox. For example
- With the Move tool selected: if you click and drag anywhere in your canvas, you will move the whatever occupies the top visible layer.
- With the Scale tool selected: if you click and drag anywhere in your canvas, you will select whatever occupies the top visible layer and scale it, opening the Scale floating dialogue.
With that in mind, here’s every tool we will use in this turorial:
-

Move Tool (m)
Select this tool (or press `m` on your keyboard) almost every time you want to move an object or a selection. -
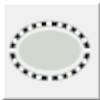
Ellipse Select Tool (e)
Use it to select (draw) a round region. In Tool Options: check "feather edges" for a softer, more seamless look. -

Zoom Tool (+) or (-)
I recommend using the keyboard shortcut to zoom in(+) or out (-) -
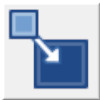
Scale/Resize Tool (shift+s)
Use to Resize an object, layer, or selection. To maintain a fixed aspect ratio, make sure the chain symbols next to the width/height dialogue are linked. -

Flip Tool
Flip the layer, object, or selection on a vertical or horizontal axis. configure the direction using the Toolbox Options dialogue. -

Rotate Tool (shift+r)
Use this tool to rotate a selection. Configure the increment and angle of rotation using the Tool Options Window -

Alignment Tool
Allign/arrange selections and images horizontally or vertically in respect of eachother or the layer the occupy -

Bucket-Fill Tool (shift+b)
Use to Fill a selection or area with a color or pattern. Configure the fill of your bucket in the Bucket-Fill Tool Options Window (pictured below)
Tool Options
By default this dialogue is docked below the toolbox, and looks different based on the tool selected.
Colors
Active Colors: Foreground and Background
Clicking either will open a floating color dialogueFloating Color Dialogue
To change the color of your foreground or background, click the one you want to change and this window should pop up. To configure the color:- Type in the color's HTML notation
- Use a palette
- use the Color Picker next to the HTML textbox if the color you want is present on your canvas
Layers
oversimply-put, layers are like those transparent projector sheets your middle school teachers used to display compound diagrams, formulas, and concepts. By the end of this tutorial, you will become very familiar with most of the componenets in the Layers Dialogue pictured below:
Layers Dialogue
You will be working a lot inside the layers window, which is one of GIMP's Dockable Dialogues.- Layer modes: for this tutorial, keep it set to "normal"
- To hide/unhide a layer: Click the eye to the left of the layer icon
- The Bottom row, from left to right:
- add a new layer
- add a new layer group
- move current layer up
- move current layer down
- duplicate current layer
- anchor floating layer
- add layer mask
- delete layer
HOW-TO SUMMARY
| Action | How to do it | |
|---|---|---|
| To move something inside a layer | Make sure you're in the correct layer and that the object is visible. Find the Move tool in the toolbox. click and drag to move your object. | |
| To delete something inside a layer | Make sure it's selected and visible then hit the `Delete` key on your keyboard | |
| To copy something inside a layer | Make sure you're in the correct layer and that the object is selected. Go to: `Edit - Copy` or `ctrl + c` | |
| To copy an entire layer: | Select the layer and make sure it's visible, copy or `ctrl+c` by default, only the top visible layer will be copied. | |
| To copy all the visible things inside all the visible layers | Go to: `Edit - Copy Visible` | |
| To paste what's in your clipboard | Make sure you're in the layer you want to paste in, then "ctrl+v" or go to "Edit-Paste" | |
| To zoom in and out | Click (+) or (-) on your keyboard | |
| To unselect everything: | Go to: `Select - None` or `Shift + ctrl + A` Do this then reselect if you're ever unsure if you selected the right thing | |
| To change the active colors | To change the color of your foreground or background, click the one you want to change and a color dialogue should pop up. Type in the color's html notation, use one of GIMP's palettes, or use the Color Picker tool | |
| To find the name and function of a tool or feature | mouse over the icons/options one by one. The name and a short description should appear | |
| To quickly rename a layer | Double click the layer name, type it in, then click enter | |
MAKING PATTERNS IN GIMP
A pattern is a small image tiled side-by-side to fill a larger canvas. before we get into each method, here are some important concepts you should be aware of:
Tile to canvas ratio:
while creating patterns, you will need to create at least 2 files, a small one for the pattern tile (50x50p - 250x250p) and a larger one to be used as a test canvas (1080x1080p - 3600x3600p)
For this tutorial we will use the following ratios:
- Pattern (tile) files: 60x60 px and 180x180px
- Test canvas: 1920x1080 px. you can also create a square or portrait test canvas if you’d like
Testing your patterns via the clipboard
“The Clipboard” is a where your computer temporarily stores the last selection you copied using the “Copy” command found in most programs, GIMP included. In GIMP however, there’s a cool feature in the pattern Dialogue, where the first pattern block is always reserved for whatever is stored in the clipboard at the time. This will prove useful for testing patterns before you commit to exporting/saving them.
Layer Boundaries
Sometimes you will need to fit the layer into the image or vice-versa. Follow this graphic to know which adjustment to make

Saving/Exporting your creations
There are 3 different methods to save your pattern creations.
- To add the pattern you created to GIMP’s patterns dialogue
- Go to:
File - Export As - Name it
filename.pat - Save file in your local My GIMP Patterns folder, which you should have added to GIMP’s shortcuts earlier in this tutorial.
- Open your local “My GIMP Patterns” Folder and either drag or copy the pattern you just saved into GIMP’s built-in
patternsfolder which should also be added to your quick access bar or local short cuts - In GIMP: refresh your pattern dialogue using the refresh button in the bottom right of the window and you should see your pattern.
- If you want to access the layers of your pattern later:
- Go to:
File - Save - Name it:
filename-pattern.xcfand save it in your local “My XCF Files” local folder
- Go to:
- Go to:
- To export your test canvas as a flat image file
- In your test canvas: move the layer you want to save to the top
- Go to:
File - Export As - Name it:
filename.jpgorfilename.png - Save it in your local “My GIMP Exports” folder
- If you don’t think you’ll want to modify the individual layers of your pattern or test canvas at a later time, you can exit upon exporting without saving. But if you want to keep working on the layers later:
- Go to:
File - Save - Name it:
filename.xcforfilename-pattern.xcf - Save either one in your “My XCF Files” local folder
- Go to:
With that said, there are so many ways to create patterns and textures using GIMP. Here are the few methods I learned over the last year:
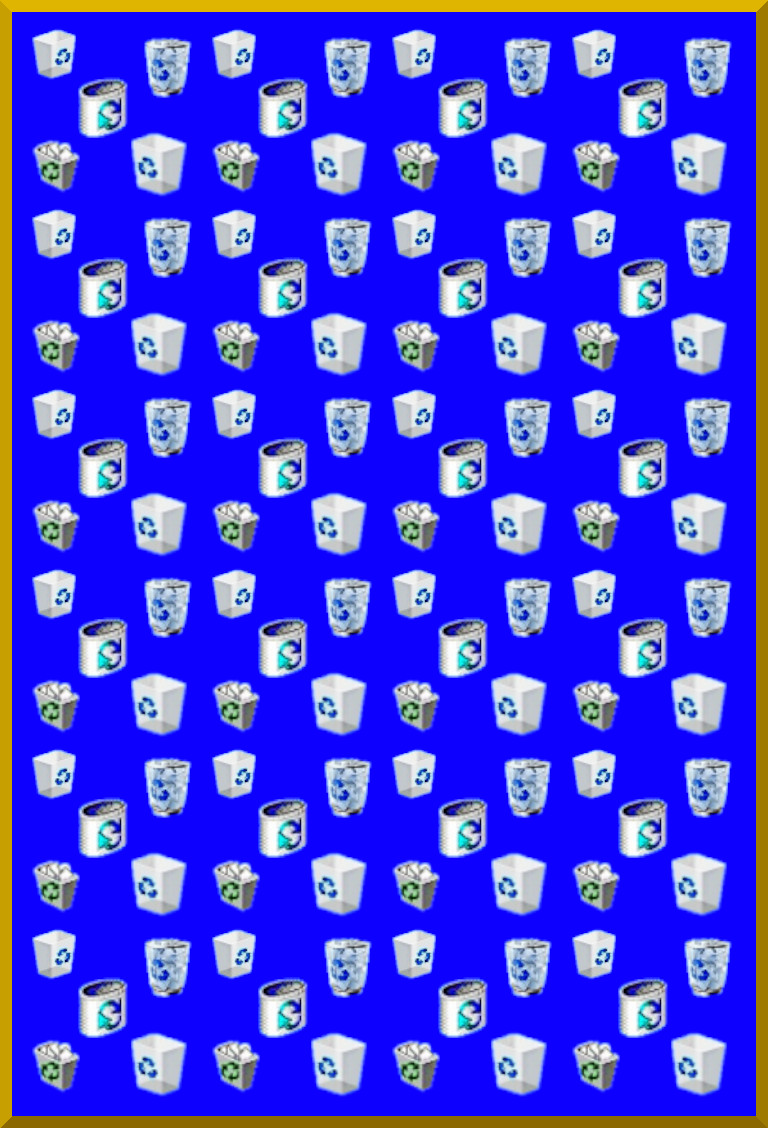
METHOD 1: tiling GIMP’s built-in patterns using the Bucket tool
This is probably the simplest way to create your first pattern. It works great if you are only looking to stack a preexisting GIMP pattern side by side in a grid.
- Create at least one test canvas:
you will keep coming back to this document to test all the methods
- Go to:
File – New - Set width and height: 1920*1080
- Go to
Advanced Optionsusing the (+) - Fill with: transparency
- Click ok
- Go to:
- Choose a pattern from GIMP’s pattern menu
- in your test canvas, Go to:
Windows - Dockable Dialogues - Patterns - If your patterns window is already docked, it should flash in place, otherwise a window should appear
- in the pattens window, expand the filter drop down menu
- select the
planttag - select the
maple leavespattern - Select the Bucket-Fill tool in your toolbox, set Fill Type to “pattern”
- Click anywhere inside the layer to apply your pattern. The result should look like this:
- in your test canvas, Go to:

Export and/or save this pattern
METHOD 2: Blending GIMP’s built-in patterns by applying the Pattern Seamless Filter
This filter comes with the Resynthesizer plug-in. Use this method to blend rocks, bricks, water, fire, or plant patterns to create a more seamless and realistic texture. it’s slower-running and does not work on layers with transparent fill.
- in test canvas: create new layer. Fill with: white
- in new layer, go to:
Edit - Fill with pattern seamless - select
maple leafpattern using the browse menu if it’s not already selected - click ok. rendering may take up to a minute but this is the result in comparison to Method 1. Not perfect but looks more interesting than merely tiling.
Export and/or save this pattern
you can try this method with other GIMP patterns or use it to blend your own creations into a seamless texture.
METHOD 3: Drawing your own pattern using the select tools
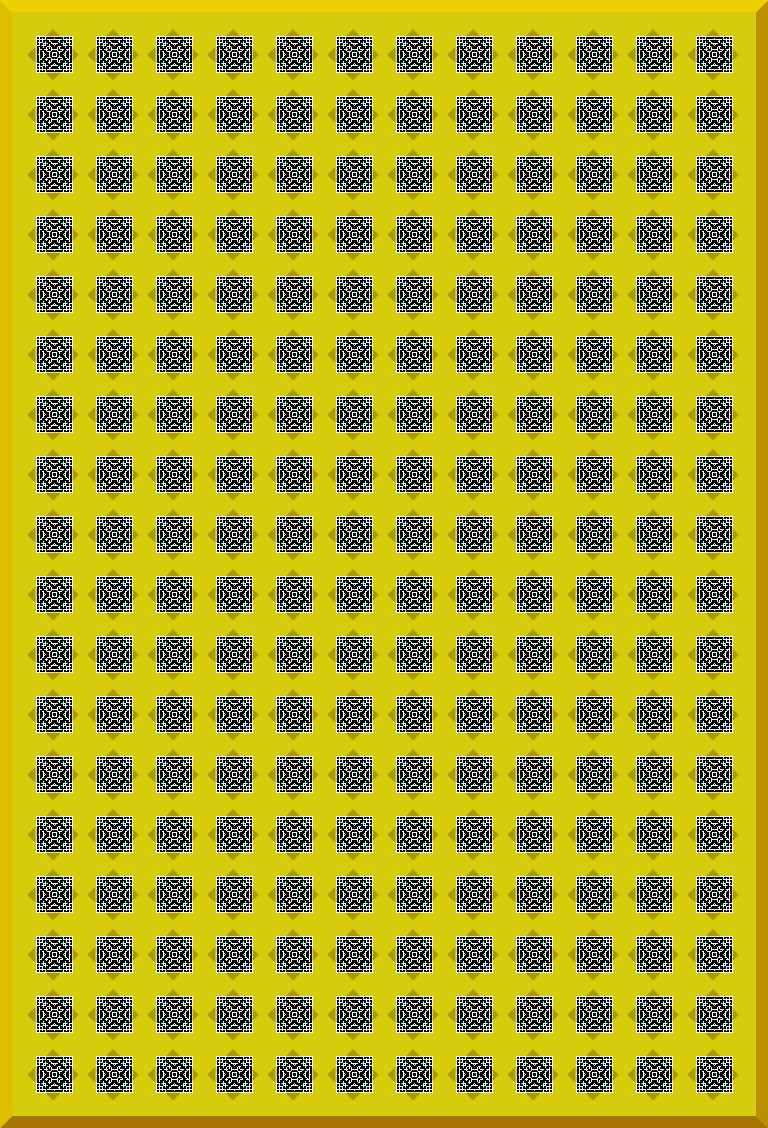
for this tutorial we’re going to use the ellipse tool to make this dot pattern:

- Create new pattern file
- Go to:
File – New - Set size 60*60 px
- Go to:
Advanced Options - Set fill color to “White”
- Go to:
- Add and snap to center guides:
- Vertical guide:
Image – guides – new guide by percent – vertical – 50% - Horizontal guide:
image – guides – new guide by percent – horizontal – 50% - Go to:
Viewand checkSnap to Guides
- Vertical guide:
- Create new transparent layer above the white background (Foreground should be Black by default)
- Draw a 30X30p circle using the Ellipse Tool
- with the Ellipse tool selected, click and drag down anywhere in the layer to draw. Don’t hit enter yet. at this point you may need to zoom in and out using + or - on your keyboard
- if you want your pattern to look exactly like the one pictured above, you may skip this step:
- In the “Tool Options” dialogue, I left “feathered edges” unchecked for this look. Check it if you want your dot to have softer edges.
- Configure the size to 30px using the
Tool Optionsdialogue found under the toolbox. - Click anywhere inside the circle to move it, then drag it towards the center. The mid point of your selection should easily “snap” to the center of the layer.
- Click
Enterdepending on zoom level, you should either see a really tiny or a really blurry black dot in the middle of the layer. that’s ok, it won’t be blurry when tiled! - Hide white background layer
- with only the top layer visible, go to
Edit - Copyorctrl+cto temporarily store your dot as a GIMP pattern - In the test canvas, create a new layer, set Fill to “white”
- Apply pattern to your canvas
- Select Fill-Bucket tool
- in the Tool Options dialgoue, make sure fill type is set to “pattern” and that the pattern source is set to “clipboard”
- click anywhere inside the layer to tile your dots
- To manipulate the spacing, angle, and size of your tiles, go to: Offsetting
How to export and/or save this pattern
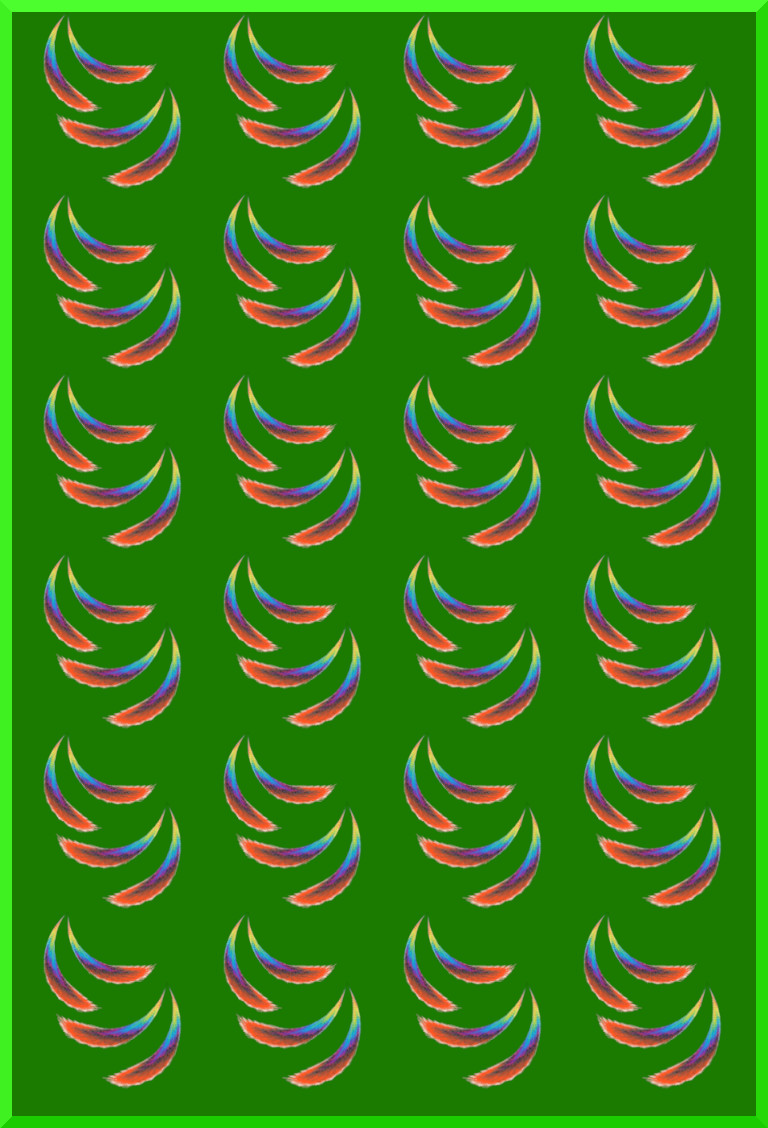
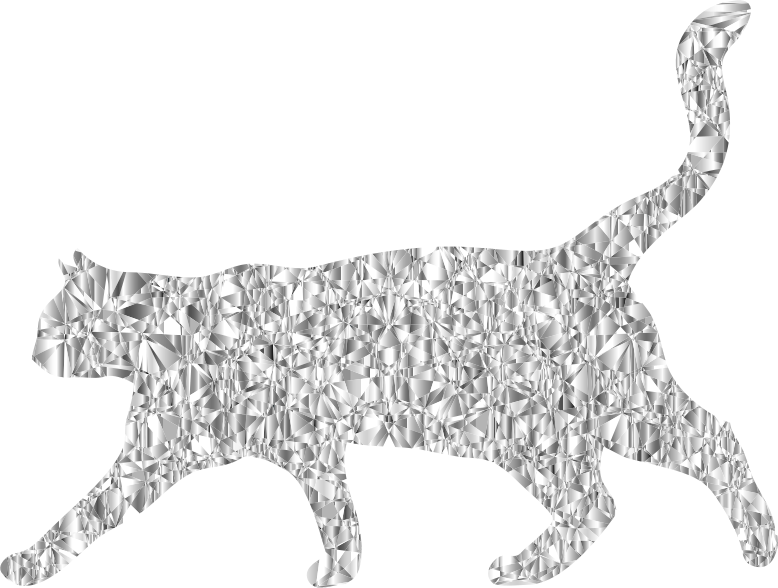
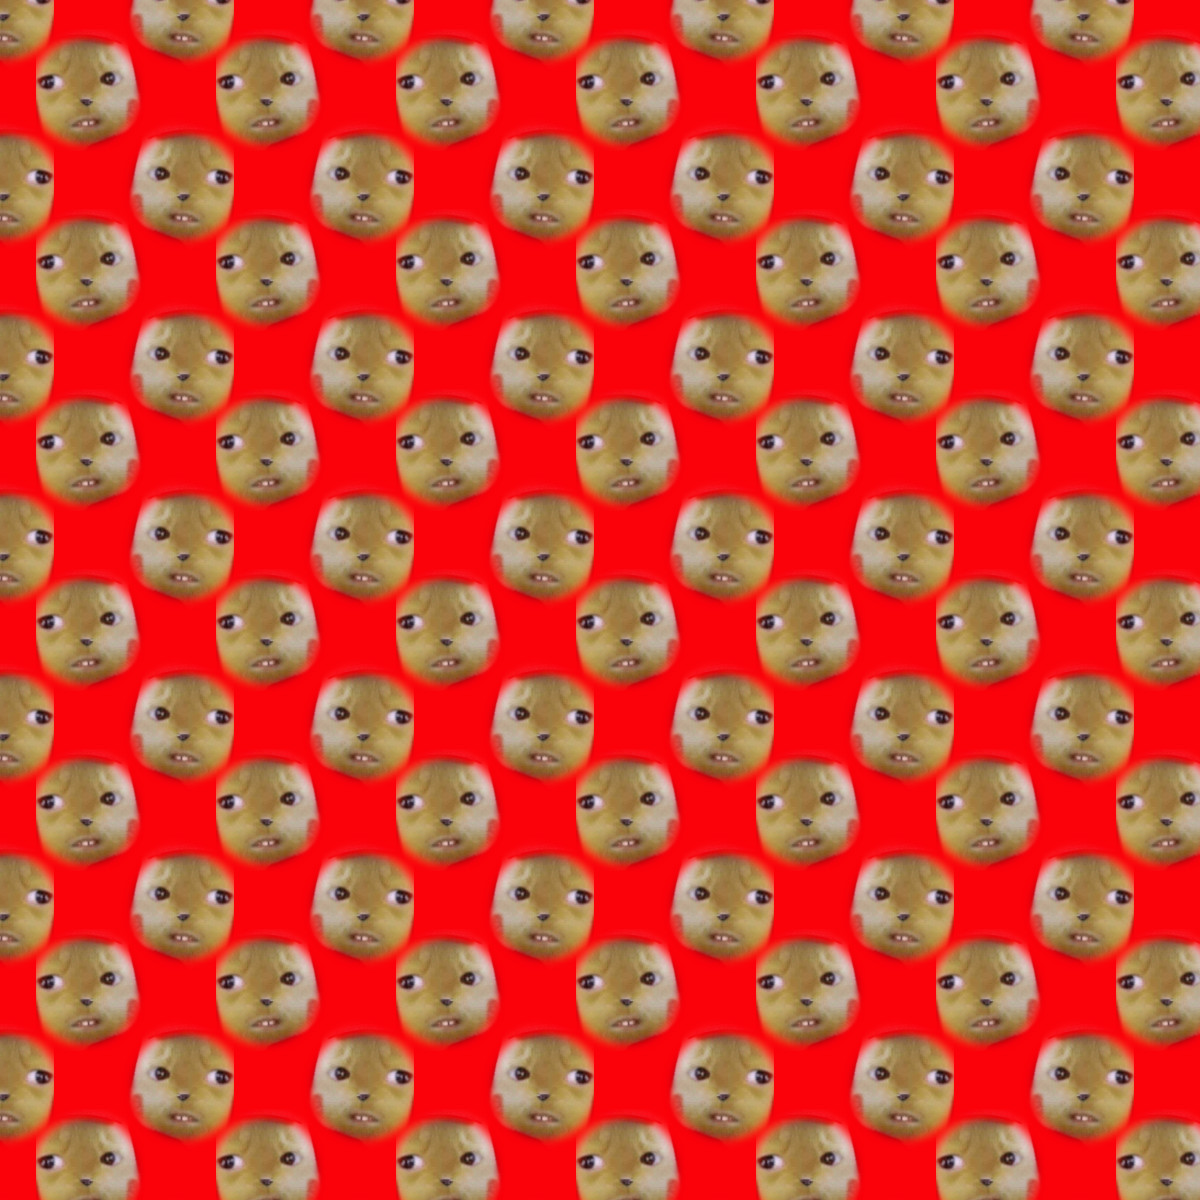
METHOD 4: tiling any image from the web using the Bucket-Fill Tool
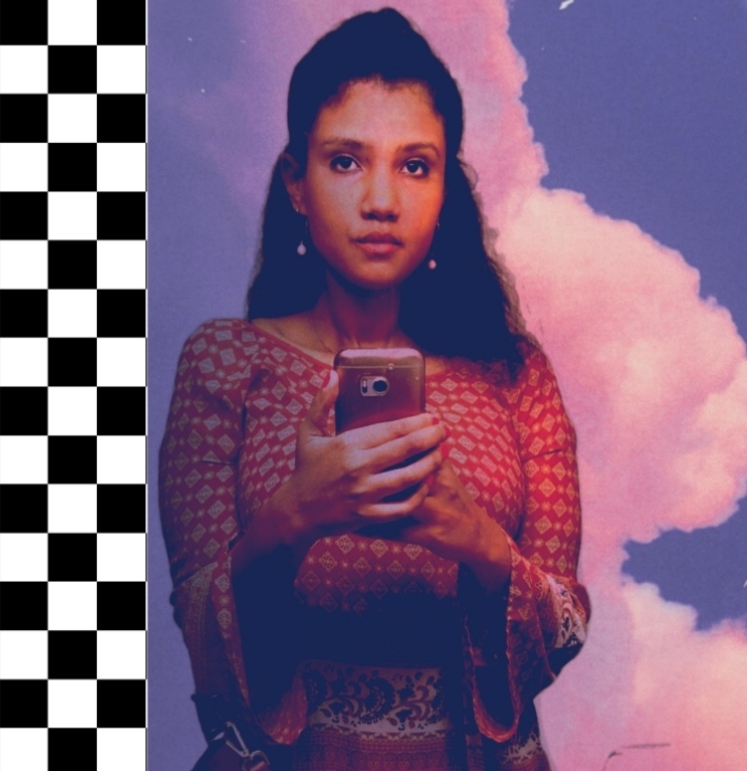
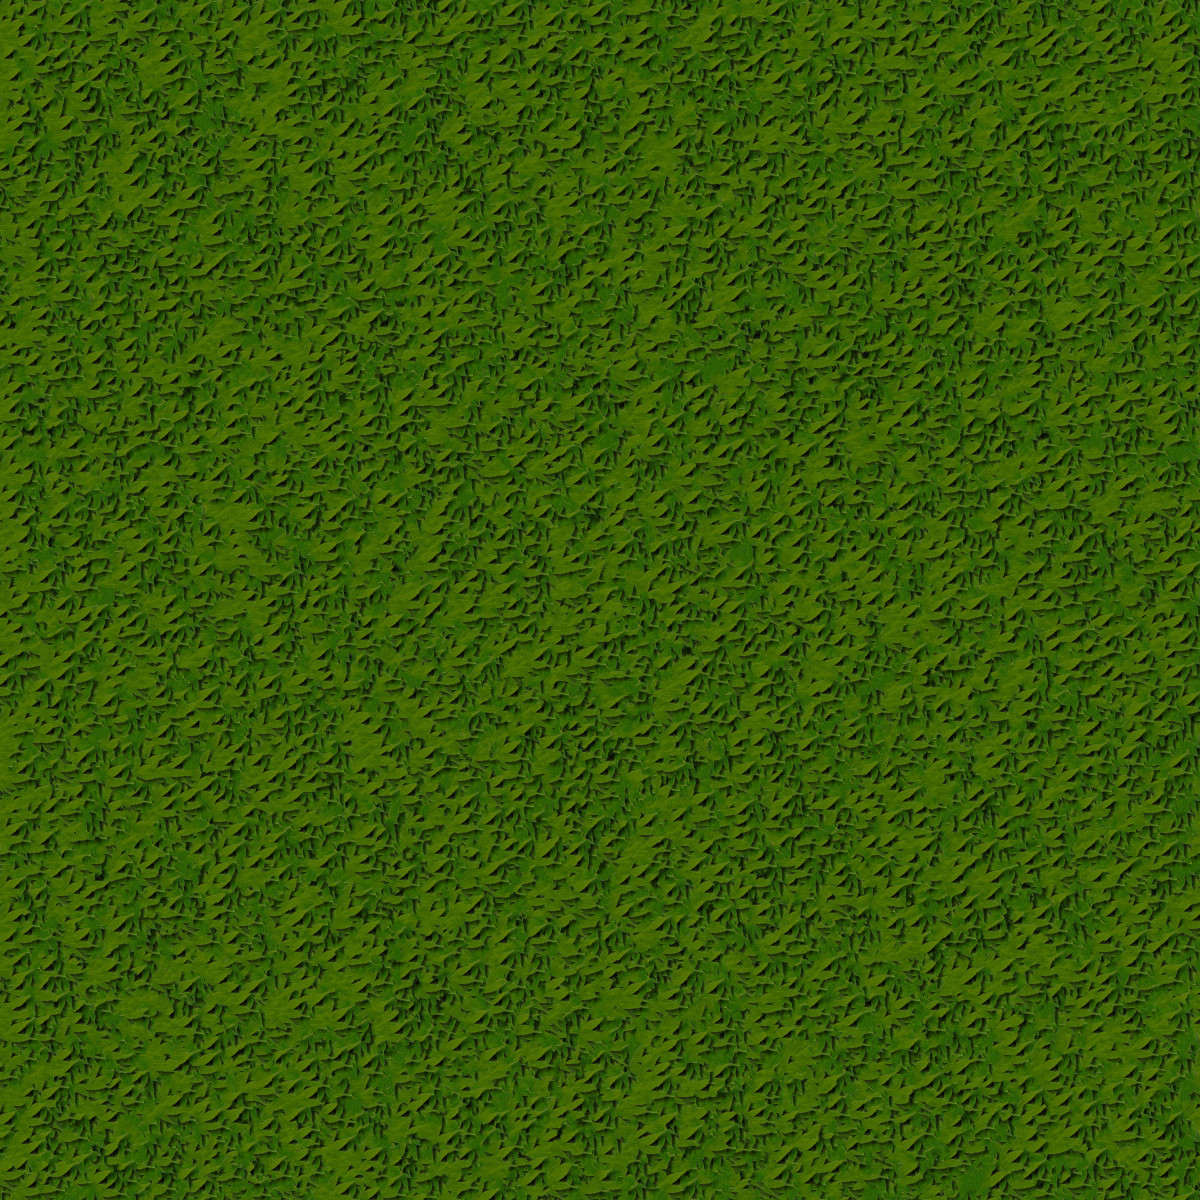
Find an image on the web that you want to make into a pattern. For this example, I am using this photo
-
Right click the image you want and
Save Image Asto download. - Create a new test canvas if you don’t have one open
- Open Gimp:
File – New - set size to 1920*1080
- Expand
Advanced Optionsusing the (+) - Fill with: transparency
Okto create new image
- Open Gimp:
- Create your pattern file
- set size to 180*180
- Go to
Advanced Optionsusing the (+) - Fill with: transparency
Okto create new image
- drag image from your local file explorer into the layers window. The image will be pasted as a new layer with the same name as the image file. -if the image pasted below the background, click (or use the arrows at the bottom of the layers window) and shift it to the top
- scale the image down
- select the
scaletool and resize the image holding theshiftkey to lock dimensions until it fits nicely inside the layer boundary.
- select the
- hide the background layer below using the lock “eye” to the left of the layer name.
- with the image layer selected, go to:
edit - copy(orctrl+con your keyboard) - Test pattern
- go to test canvas then create new layer and fill with Foreground (or whatever contrasts better with your design)
- in new layer: select bucket-fill tool. set Fill Type to “pattern fill - clipboard image”
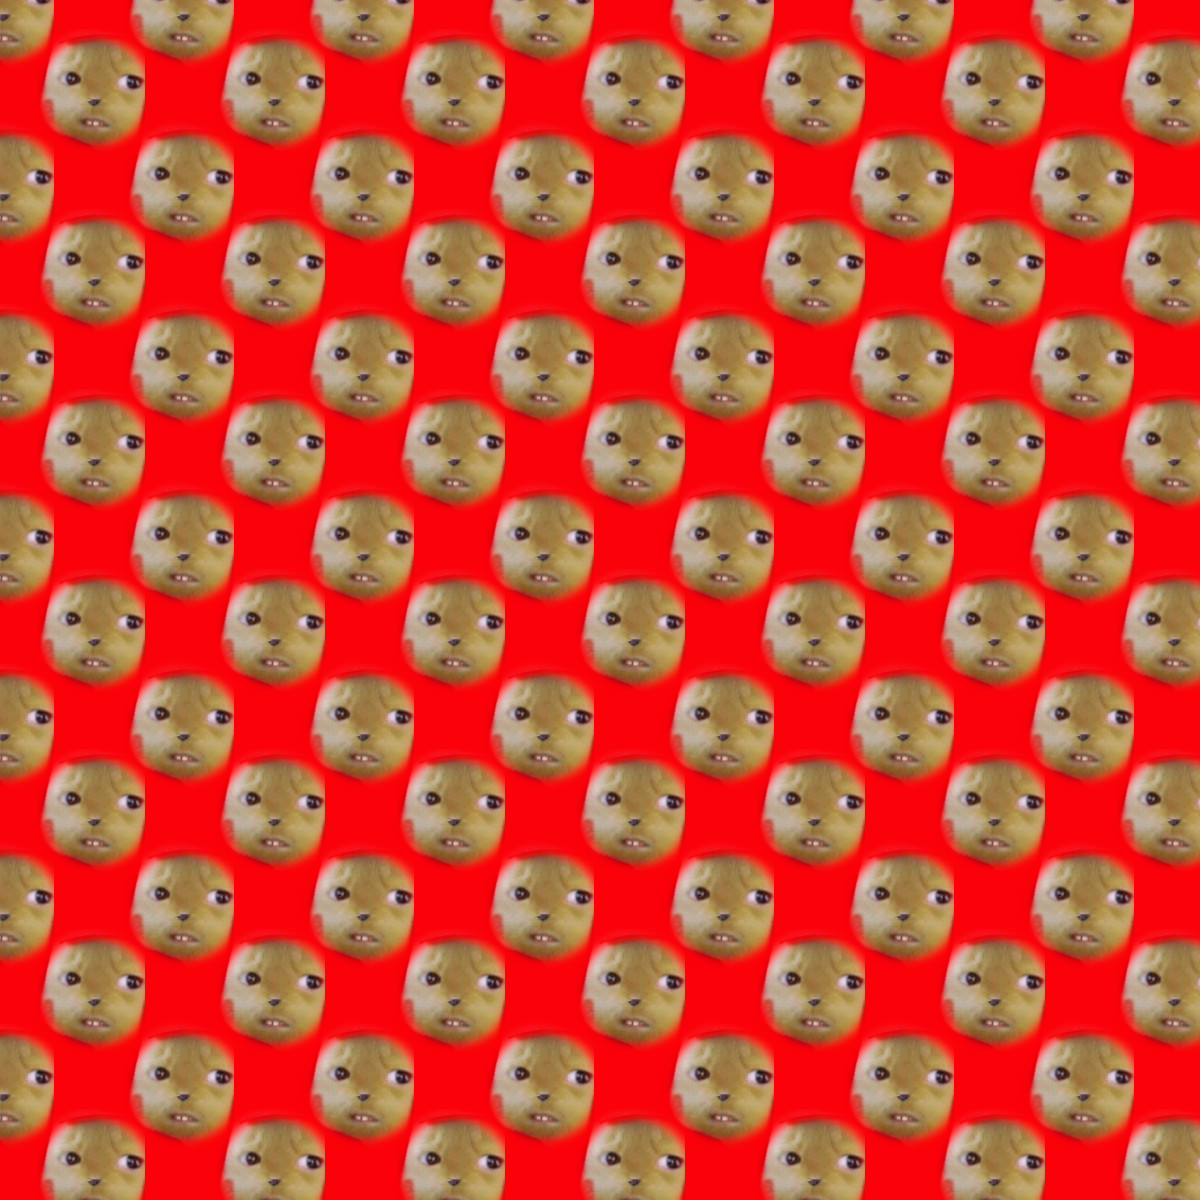
- click anywhere in the layer to apply fill.
you should get something that looks similar to this:

- To manipulate the spacing, angle, and size of your tiles, go to: Offsetting
How to export and/or save this pattern
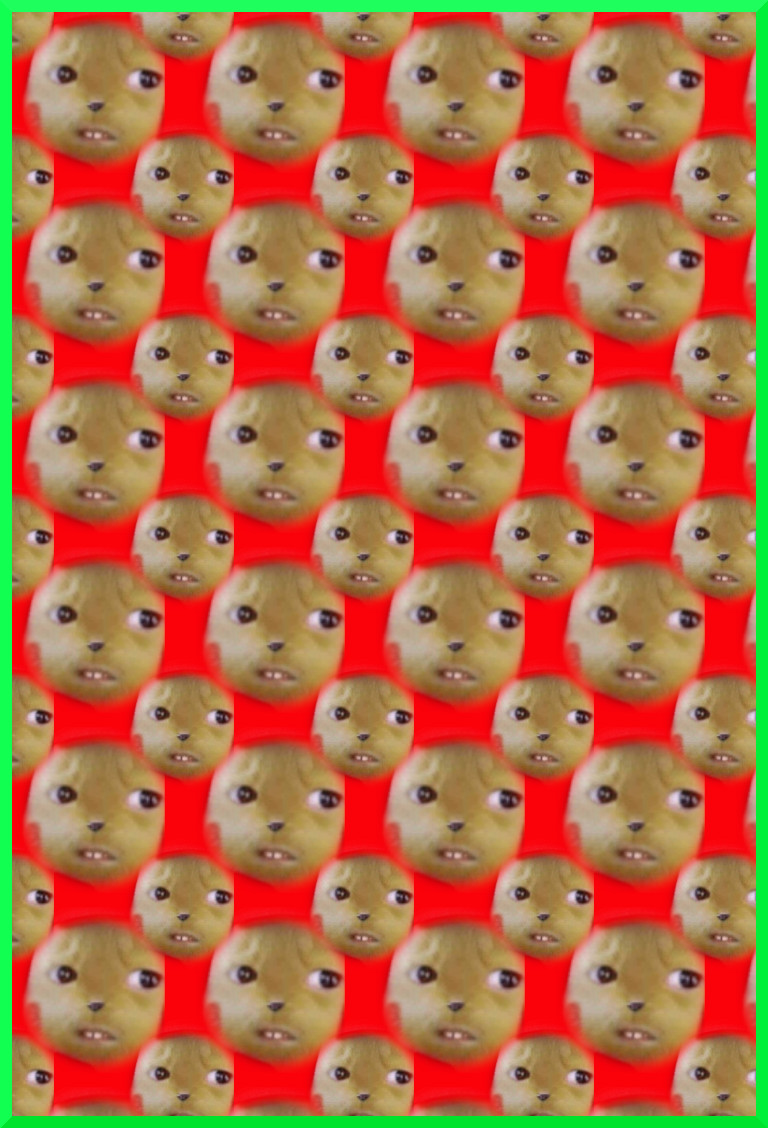
METHOD 5: Tiling a specific part of an image using the Select Tool
for this example we’re going to tile the face of Pikachloe in the image below:
you should get something that looks similar to this:

- Create your pattern file
- set size to 180*180
- Go to
Advanced Optionsusing the (+) - Fill with: Transparency
Okto create new image
- Save and drag image from your local file explorer into the layers window. The image will be pasted as a new layer with the same name as the image file. -if the image pasted below the background, click it (or use the arrows at the bottom of the layers window) and drag it to the top.
- Scale the image down
- Select the
scaletool and resize the image holding theshiftkey to lock dimensions until it fits nicely inside the layer boundary.
- Select the
- Cut out the part of the image you want to tile
- select the “Ellipse Select” tool
- in “Tool Options” check “Feathered Edges” and set the radius to about 40%
- draw a circle around the face, then click enter
- Go to:
Edit - Copyorctrl+c - Go to:
Edit - Pasteorctrl+v- A floating layer should appear at the top of your layers dialogue, click “Add New Layer” to anchor it as a full layer. - Hide uncut image layer
- Test your pattern
- make sure only the ellipse selection layer is visible and is on top.
- go to:
Edit - Copy - go to test canvas
- create a new layer
- select bucket-fill tool, make sure fill type is set to
patternand that pattern is set toclipboard-click anywehre on the screen to apply fill. This is the result you will get:

To get your tiles to look like the ones below, go to Offsetting to configure the spacing, angle, and size of your tiles.
Export and/or save this pattern
OFFSETTING
- Go back to your pattern layer
- Duplicate it using the
duplicate current layerbutton at the bottom of the layers window - in duplicate layer only (which should be on top of the original):
- go to:
layer - layer to image size - again in duplicate layer, go to:
layer - transform - offset - by width/2, height/2now you should see the same pattern copied in all 4 corners
- go to:
- Copy both layers to your clipboard:
- go to:
edit - copy visible(this should copy both layers into your clipboard and temporarily occupy the the first block in your patterns dialogue)
- go to:
- Test your new pattern
- go to your test canvas.
- create new layer and fill it with BG or FG (whichever contrasts better with your design)
- in new layer: select bucket-fill tool. set Fill Type to “pattern fill - clipboard image”
- click anywhere in the layer to apply fill.
- More tweaks you can try after you duplicate the original pattern layer (step 2)
- use the
scaletool to change the size of either the duplicate or original pattern layer (or both) - use the
fliptool to vertically or horizontally flip the original or duplicate pattern layer (or both) - use the
rotatetool to change the angle of either the original or duplicate layer. For example, changing a square into a diamond.
- use the
ADDING A BORDER & BEVEL
To add a border to any image:
- Go to
Filters - Decor - Add Border - Configure the color and thickness (I have my X and Y set to 12 and delta level set to 25)
- To add a bevel to your border, go to:
Filters - Decor - Add Bevel - Make sure
work on copyandkeep bump layerare both checked - Play around with the thickness (I had my bevel thickness set to 5)
- Click OK
HELPFUL RESOURCES
- Download GIMP:
- Helpful Plug-ins:
- Useful Brushes:
- Video Tutorials:
- How to put someone’s face on an object
- Photo enhancement techniques
- Intro to layers
- All layer modes explained
- Creating T-shirt mock-ups
- Creating seamless patterns from a drawing
- Top 10 Filters in GIMP
- Clone tool explained
- Clone, Healing, and Perspective tools
- Creating 3D text
- Steal the color grading from any image
- Creatinng a dot pattern with GIMP
- Royalty-Free Images: